Wednesday, July 30, 2014

Wreath-Visiting Bailing Twine Wreaths

 Making wreaths out of reused bailing twine is both challenging and rewarding.
Although I don't have written directions... here are some hints:
*cut twine at the knots as you feed out hay - this makes it easy to pull individual pieces from a bundle and creates a nice starting place for the braid
*count out three equal bundles of twine and wrap one piece of the bundled twine around the bunch just below the knots
*put all three together and similarly, wrap them tightly together with one piece, & tie so the end dangles inside the bundle.
*bend a wire coat hanger in a circle with pliers and the hook down to make a ring for hanging up the finished wreath
*lay the bundled knots on the wire coat hanger circle, directly across from the hanging ring.
*braid around the circle, incorporating the hanging ring when you come to it.
*when you get all the way around, wrap one of the end pieces of twine around the bunch of knots and the other end pieces so they hang together.
*I like to trim the hanging end pieces so they are the same length.
*check the photos in these blog posts for more ideas: 
* you just have to fiddle with it until it looks right to you.

Saturday, March 22, 2014

FreeBEE Honeybee BEE

25 beekeeping enthusiasts BUZZED over to the Taghhannuck Grange Hall to Motherhouse's first FREE-BEE honeybee BEE. BEEginner, experienced, and wanna-BEE beekeepers shared their stuff!
Todd Shearer brought in and showed us a top bar hive designed by the Barefoot Beekeeper, He chose this style BEEcause he could build it himself and the bees are usually calmer to work. His family is dedicated to working with nature to create a permiculture, bio- and educationally diverse yard... I call it "Shearer Heaven."
Wyatt Whiteman showed us his elegantly simple homemade solar wax cleaning system. Using all recycled materials; wooden box with scrap lumber props, black plastic paint tray, food tray, hardware cloth, and window frame painted with leftover paint,
Wyatt lays wax scraps on the hardware cloth, closes the window; the sun melts the wax; it drips onto the paint tray, runs down into the lower edge, thru the small center opening, into the smaller food tray; leaving debris behind.

To make candles, he pours the wax from the food tray directly into a mold. He threads the mold with a long length of wicking, and winds it around the mold to keep it closed. When removing the candle, he pulls just enough wick through the mold to set it up for the next candle.
Joe Benete showed us the "tools of the the trade." Then a panel of  backyard beekeepers waxed enthusiastically about their experiences.

Fair-trade, organic coffee and chai tea made with local B&B honey and Thorncrest Dairy milk was generously provided by Coffee, Tea, Etc.
To deter bears, panelists recommended Sonpal's Power Fence (860 491-2290) and/or keeping goats, and a cow, and many active children in the yard.
After a honey of a potluck lunch, local herbalist Alicia North of North Star Botanicals , gave a BEEutiful presentation of foraging honeybees and BEEnificial plants.

Visit the Motherhouse website for a fellow beekeeper's poem about beekeeping and life.

Saturday, March 8, 2014

SPINspiring WoolWorks Workshop

We had our arms full as nearly 40 people RAMbled by the Taghhannuck Grange Hall for the EWEnique Motherhouse Old Style Life-Skills Series workshop; WoolsWorth.
Joe Benete brought 4 young lambs for us to meet. He feeds the smallest with a nipple pail.
Dody and her pet sheep, Rose, taught crocheting.

Young Darwin taught finger weaving...

...so well that we all could do it.

Tal of New Twist showed us how to use a drum carder to comb the wool fibers in one direction to make for easy spinning...

...and then how to use a wooden spindle to spin the fibers into yarn.

Vera let us take a spin at her wheel... and showed us some of her naturally dyed homespun yarn. With alum as her mordant, these three colors are from goldenrod blossoms, black walnut husks, and spruce cones.

Dr Hayden stopped by to visit his former patient.

With Rachel's guidance, some of us put a new spin on old CDs...
...and used them to make our own spindles.

...and Margaret provided the icing on the cake for our pot-luck lunch.
All in all, it was a WOOLy good shEWE!!!
To learn about raising your own sheep and goats, come to our OSLSS workshop Get Your Goat and Sheep on May 10.


Saturday, February 8, 2014

A SUDSational Workshop

We met at the Taghhannuck Grange hall for an evening of fun and lather...
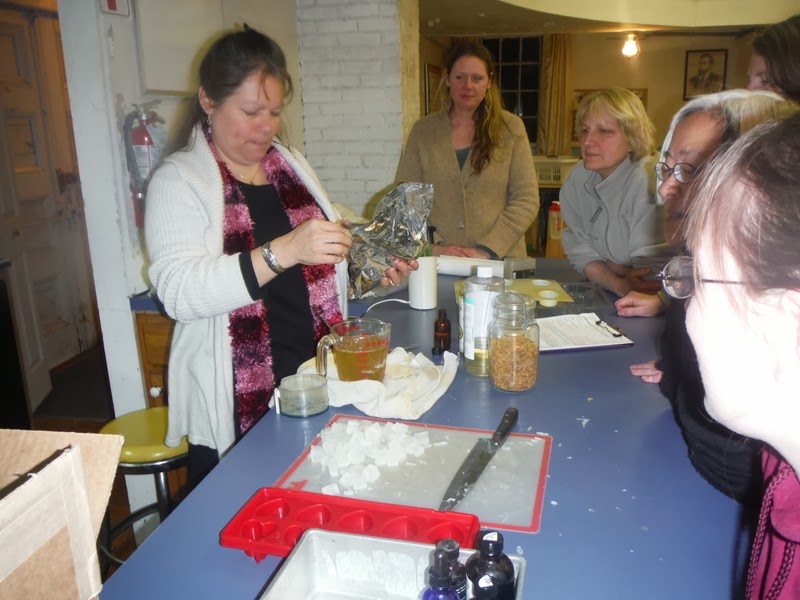
Sharon Laughlin of Made for You soaps started off the evening by demonstrating how to use the cold water lye process to make Gardeners' Soap with a natural degreaser... coffee!  She makes a batch of coffee and freezes it in ice cube trays. Wearing rubber gloves, a surgical face mask, and full plexiglass face shield, she sprinkles the correctly measured lye over the ice in a heavy duty plastic pitcher. The lye melts the ice and the resulting mix is around 100 degrees. Sharon lets it cool as she warms her oils.

When oils and the coffe-lye mix are both between 80 and 98 degrees she mixes the coffee-lye into the oils and blends with two(!!) hand held blenders...
.

...until the mixture thickens and begins to "trace." Then, she stirs in ground coffee beans and pours the whole mixture into molds.

She has beautiful hand-made molds of Corian scraps leftover from her husband's kitchen business. The ends pull out so she can easily push the soap out after it hardens. To prepare the molds, she slathers them with mineral oil, lines them with parchment paper, and oils the paper.
Once the mold is full, she covers the soap and wraps it up in a blanket to keep warm as the lye and oils interact or saponify.
In about two days the soap will be ready to slice. Again, Sharon shows her clever use of Corian scraps with her own home designed soap slicer. Once sliced, she'll label the soap with the date and recipe and lay it on racks to cure for 6 weeks. She uses ph paper to check for when it is fully cured and safe to use... around ph7.

Then I talked about making milk soap and using lard instead of vegetable oil. You can see last year's post for information about that.

Next, Alicia North of North Star Botanicals showed us how to use melt-and-pour glycerin soap base to make "Earth and Ocean Lemon Grass Soap."
 First she used a knife with a big blade to cut the block into cubes and put them in Pyrex measuring cups.
Then we heated the soap cubes in pans of boiling water until it melted.
Alicia added castor, jojoba and avocado oils to the hot liquid base. After the mix cooled slightly, she stirred in ground calendula blossoms for a golden color that won't spoil or turn brown and skin healing properties, kelp powder for additional minerals, and essential oil of lemon grass for the lovely scent as well as its antimicrobial/antibacterial action. Alicia warned us to be cautious with lemongrass on delicate tissue!  We then poured the mix into molds...
... spritzed them with rubbing alcohol in order to break any bubbles on the surface, and took them outdoors to speed-cool.
To get them out of the molds, Alicia puts them face down on a cutting board and (VERY) firmly presses from outer edges toward center of each mold until the soap releases.

Finally, for a soothing wash for poison ivy sufferers, we stirred a decoction of jewelweed into another batch of melted base. I harvested the plant late last summer and simmered it in water for about 20 minutes, strained out the plant matter, and froze the brew.  We added about 1/4 cup to a pound of soap base.